Saturday, May 29, 2010

Tutorial: Easy Petticoat of AWESOME

If you've noticed, I tend to wear petticoats underneath my dresses pretty often. The reason for this is twofold:

fold 1) I'm tallish, and I like my dresses to hit right below the knee. Often they do not. A petticoat underneath help with this.

fold 2) Dresses that are transparent/tend to cling are made awesomer by an underlayer. Some people would wear a slip to combat this. I wear a petticoat. The reasons for this are twofold:

sub-fold 1) Slips are often polyester, which makes me sweat like an unholy sweating thing. I'm not good with analogies.
sub-fold 2) Petticoats, with their cute little ruffle sticking out at the bottom, are totally cuter than slips, IMHO.

I mean, seriously, see how cute this is?


So, with all those preliminaries out of the way, I made the petticoat pictured above this week, and I wanted to put together a tutorial on how you, too, can join my petticoat army by making one for yourself!

You'll need:
- 1.5 - 2 yds of cotton batiste, muslin, or cheap quilting calico (depending on your measurements, which we'll take below)
- 1-2 yds of 1/2" wide elastic
- 1.5 - 2 yds of eyelet trim - you can go nuts with this, there are tons of options for width, lace type, etc.
- swedish tracing paper, to make your "pattern" (so you can easily duplicate it later if you'd like another petticoat!). This is not a must, you can use any kind of paper, tape together printer paper, etc.

Sewing essentials to have around:
- Cardboard cutting mat with gridlines (not necessary, but makes it easier!)
- a big ruler/straight edge
- measuring tape
- chalk to make pattern
- scissors, obviously :)
- sewing machine
- seam ripper, if you're like me :)


I really owe figuring out the measurements for this to Gertie's fab half slip tutorial. Go check it out, she explains things really well. Since we're doing things slightly differently, I'm typing up my own version here.

The pattern will be a rectangle - it's super easy!

Step 1: Take your measurements
- Measure around the widest point, could be your hips, badonkadonk, etc. Don't pull the tape measure tight. Then, add 3 inches of ease to this number. So, if your widest point is 55 inches, then your number will be 58 inches. Divide this number in half - your slip will be 29 inches wide (I just rounded up to 30". I'm a rounder, what can I say?).

- Measure how long you'd like the slip to be, from where you typically like things to sit at your waist (for me, this is my high waist, not my natural waist), then add 1.5 inches for hem and elastic. Keep in mind that the width of the lace you choose affects this number, as does how much you want poking out of the bottom of your skirt. My measurement was 20", since my petticoat lace was about 4 inches wide.

* It's always better to err on the side of a little bit too long, because you can always hem it shorter and then reattach the lace if it comes out a bit longer than you'd like. My goal for the petticoat was to have the seam where the lace joins the slip to not show, but only the last 2 inches of lace poke out from underneath the dress.

That's it! All the measurements you need!

Step 2: Draw your rectangle pattern
- Draw a rectangle that is 30"x20" (of course, using your own measurements). Add in 5/8" seam allowance to the sides only, so your rectangle will end up being 31 1/4"x20" (with your own measurements, of course).

Step 3: Fold your (prewashed!) fabric in half, and lay the rectangle pattern out. Pin it in place, and cut it out! You should have two awesome rectangles.

(pattern pinned in place over fabric)


Step 4: Stitch up the sides of the slip with 5/8" seam allowance on both sides. You should have a big tube (or a useless pillowcase, as I like to call it).

Step 5: Finish the edges on the side seams. Since this is cotton, and these are the only unfinished seams of the garment, I decided to do a zig-zag stitch, then pink the edges. If you don't have pinking shears, then a zig zag stitch closer to the raw edge of the fabric works well too. Press the seams flat to one side.


Step 6: Make your casing for the elastic waist!
- Fold under ~3/4" from the top of your skirt, and iron it down. Then, fold it again and iron. You should have something that looks like this:


- Stitch it in place close to the bottom of the fold, but be sure to leave a ~2" opening for you to feed your elastic in!


Step 7: You need to cut your elastic to the right length. Wrap the elastic around you where you want your petticoat to sit. Pull it comfortably tight. This is your elastic length. (for guidance, Gertie says it should be about 3" smaller than your waist measurement). My high waist, where I want the elastic to sit, is 42". I cut my elastic at about 39". It's pretty loose, but I like it loose. I'm a loose woman.

Step 8: The casing is hungry. Feed the elastic!

I use a safety pin:


Step 9: Sew the elastic together and close the elastic feeding hole (sounds gross)
- Overlap the ends of the elastic flat and sew them shut using a narrow zig zag stitch. Make sure you haven't twisted the elastic in the process of feeding it through the casing. Then, straighten the gathers and try on the petticoat to make sure everything seems good to you. If the elastic is right, stitch shut the hole where you fed the elastic into the casing.

Step 10: Attach the eyelet lace
- You will need enough lace to go around the bottom of the petticoat. This is basically your first measurement before halving it for the pattern (mine was 58", remember?). Add 5/8" seam allowance to each side of the lace, then cut it. Sew the lace together at the ends, making a big lace necklace/hula hoop/even more useless pillowcase.

- Pin the lace around the bottom, wrong side of the lace to the right side of the fabric. We are going to sew it really close to the bottom edge of the petticoat, so pin it about 1/4 - 1/2 inch from the bottom edge of the petticoat.

- Sew the lace on at the top of the lace using a narrow zig zag stitch and about a 2-3 stitch length. Go slow. I always go too fast and end up running off the lace and having to rip out the seams and start over... so go slow.

- If you'd like, go back and trim the underneath where the raw petticoat edge is sticking out with pinking shears. I didn't :). I was also runnning out of thread:


Step 11: Put it on with an awesome dress and make that dress even awesomer!


I'm excited to make some more - perhaps using multiple layers of eyelet to give an even rufflier look.

Did you find this tutorial helpful? Please let me know if you have any questions in the comments!

Thursday, May 27, 2010

Asos Curve dress FTW!

Last month I ordered from Asos Curve for the first time. I was so inspired by the way that Ms. Definatalie rocked it, I just had to have one :)

So, the dress came in, but I don't really know UK sizing very well, so it was quite a bit too big for me in the top (the bottom, however, fit quite well). Off to the alterations lady for me!

I got it back and it is so awesome! I had to share. Because here, we're all about sharing!


(dumb posing!)

I wore an old gap skirt for fullness/modesty underneath, because this dress is definitely transparent:


With pockets!


Outfit details:
Dress: Asos Curve, UK size 24 (I'm typically a size 18-20W in US dress sizes)
Underskirt: gap, xxl, light pink, years back
boots: lucchese's, from shepler's in austin, men's size 10
necklace: $1 bin, fremont farmer's market

All in all, I think I may order from Asos in the future (sometimes they run free/reduced international shipping promos), but I will definitely order a 22 next time!

Tuesday, May 18, 2010

Retro splendor: sweater guards

If you employ cardigans in your wardrobe as much as I do, sweater guards - also known as sweater clips and cardigan clips - are a really fun way to spice up and retrofy your look without going overboard (though, sometimes overboard is fun).

Here are two recent outfits where I used these awesome sweater clips that Bob got me for Christmas last year.


(it's hard taking pictures of myself!)


(it really is!)

Outfit details:
Dress: Target xxl, 2008
Cardigan: Target xxl, 2008
Petticoat: thrifted
Shoes: Target, size 11, 2008
Sweater guard: gift from husband, etsy

Another way to wear them - attached to a collar, rather than a sweater:


The entire ensemble:


Outfit details:
Dress: via clothing swap (free!)
Petticoat: thrifted
Shoes: faryl robin, size 11, years back (and recently chewed by the dog, I'm hoping the cobbler can fix them because I LOVE them).

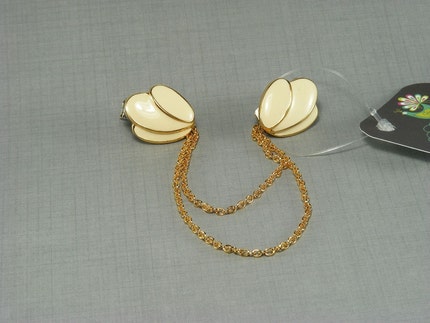
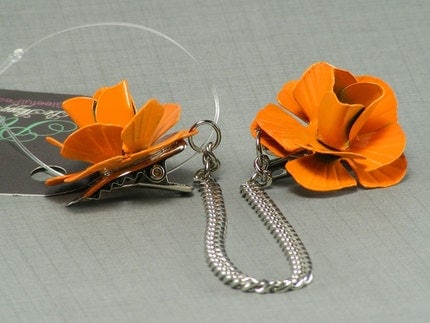
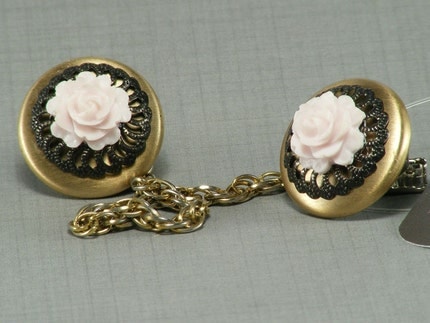
Do you likey what you see? etsy is a great resource to find newly crafted as well as vintage sweater clips! Here are some of my current favorites:


Tuesday, May 11, 2010

How to: travel light, yet stylish

Hello lovelies,

I wanted to gauge interest in the title topic (see it above?). I travel about twice/month for work, sometimes more, and so I've gotten REALLY good at packing awesome stylishness into a carry-on. Would you be interested in seeing how I accomplish such a feat, or me writing up a little how-to on packing for trips where you may want to be stylish?

Let me know in the comments!

See how traveling lets you experience new things?

Monday, May 10, 2010

Making it work: maxi dress as skirt

Like many of us fatshionistas, I have a large chestal region. I like it. But, sometimes things don't fit in the boobs, especially if those things are straight-size target maxi dresses from the juniors' section. I know, right? Why on earth would that not fit my boobs?

Waffles wonder why.


(these two pics are from last year)
Looks great from the front:


But the side shows us the real issue here: Smashing smocking!


Back to modern times: Let's pull that thing down, shall we?


Paired with a black top and cream cardigan:


Super cute, and kind of country, which is a theme for me I guess lately:


Details:
Dress-as-skirt: Target xxl, 2007
Top: Target maternity xxl, 2007
Cardigan: Old Navy 1x, 2009
Cowboy boots: Lucchese, from Shepler's in Austin, gosh, years back, I don't even remember!

Wednesday, May 5, 2010

I made a skirt!

One of my goals this year is to become a better sewer (sewist?). I know I talked a few posts ago about making a dress from a vintage pattern, and I PROMISE I'm working on that too, but it is really slow going, what with the tracing the pattern out and adjusting the size up to fit me... so I thought I'd try something a little simpler.

I was inspired by Gertie over at Blog for Better Sewing to try out her gathered skirt tutorial (part 1, part 2).

I would really recommend this tutorial to intermediate/beginner sewers - though not people that have never sewn before. I definitely learned alot - like how to do a blind stitch hem (video tutorial here), how to gather heavy material using a zig-zag stitch and cotton cord (tutorial here), and how to insert an invisible zipper (which was the hardest part for me, tutorial here). I followed instructions almost to the letter. Except the hand-basting parts. That's too much for me, I can hardly sew a straight line WITH a sewing machine, let alone by hand.

I picked a heavy material because I wanted the skirt to have a lot of body. I found this 100% cotton home decorating material (think curtains!) in a blue and cream tiny check (kind of ginghamy?) on the $4/yd table at Joann's.


See me pinning things before sewing them?


See me pressing open my seams?


I pinned almost everything! This is really rare for me. And probably why my projects don't usually turn out so great.


But this project turned out really well:


hello knees!


Sassy!


I love having a finished product turn out so well! It's really durable and feels really well made. I am very proud of myself! But, on the other hand, this project was totally frustrating. It took me probably 15 hours to make it, from cutting it out, to putting it all together (and messing up the zipper like 5 times). I think I don't really enjoy the process of sewing. I like having an awesome skirt that I made for myself, to my measurements... but the actual MAKING of the skirt was a totally frustrating and backache inducing process.

I also think I have amnesia about how frustrating it was, because I've already bought more fabric to make another one. I'm going to try a wider waistband at the top for the next one!

How do your craft projects usually turn out? Do you, like me, underestimate how much time and effort they will take?

Tuesday, May 4, 2010

Awkward and honest ramblings on my propensity to buy clothing

Definatalie linked to this article by Ashe Mischief on the relationship between fashion and finance, and I wanted to post about it too, because it's something I have been thinking about for the past few months.

You may notice, from reading my blog or seeing my posts over at fatshionista, that I buy a lot of clothes. I love buying clothes. Especially dresses. And while I do thrift shop and buy things on sale when I can, I don't really let the lack of a sale keep me from something I want. I'm fortunate, I'm half of a dual-income-no-kids relationship, I have extra money, and with all the fashion blogs I follow, I have a steady source of "inspiration" to buy more things. I put "inspiration" in irony quotes because I feel that sometimes all I am doing here, and all many fashion blogs do, is encourage people to buy shit.

Honestly, I need to stop buying stuff. I don't have room anymore. I don't wear the items I love very frequently because I have so much other stuff. But, on the other hand, I still feel like I don't like what I have or get stuck in a rut wearing the same jersey dress with a dark cardigan every day... and so I think buying something new will help.

I've been gaining weight/changing body shape over the past year as well, so things don't fit me as well, and I've experience growing out of clothes that fit me only last year. That sucks, and I really hate it. So, I buy more not just to replace what doesn't fit... but I also buy more because I'm looking to find new shapes that will flatter my new shape.

This is super honest for this mostly fluffy blog.

So, what do you think? Do "fashion inspiration" blogs (like this one, I like to think) help you or do they just encourage consumption? Is there a way to tread the middle road, being inspired but not feeling like you need to purchase something? Is it just me that feels this way - because I have to tell you, when I see someone out in the fatosphere rocking an awesome dress from Old Navy that I think would look great on me, I pretty much go and buy it immediately. And then I feel kind of bad for doing so. Maybe it's just my own issue.

Monday, May 3, 2010

I'm a country girl at heart (an eShakti denim dress review)

I blogged a few posts ago about my eShakti denim dress order. The dress came in a few weeks ago, and after washing it to get the wrinkles out (I'm constantly impressed with how tiny a box they can package a dress in, since it has to come all the way from India), I thought I'd show you it in all its countrified glory.


To be fair, I'm only joking about how Texas it looks. In reality, it's a soft and thin (but not transparent - think summery and breezy) chambray. The mustard colored thread detailing, and the brass buttons, are really what makes this dress look denim, not the fabric weight.


OHAI I DINT SEA U THAIR

I love the full skirt, the tailored look, and how it fits loosely enough to be comfortable and skim over my backfat rolls, but not too loosely as to look sloppy.


I paired it with my Pikolinos oxfords, and my dollar-bin brooch. I didn't want to do cowboy boots because I didn't want to push the look over the edge, and I think any more accessorization would also have been too much.

Overall, I'm really pleased with it, and I also think I've nailed the eShakti sizing now - I'm pretty much a solid 20W in their dresses, as I've had several now of that size that have worked out well for me.

Model measurements: 5'7 or 8", 250ish, 46/42/55 (and still growing) :)
Related Posts Plugin for WordPress, Blogger...